ONVIF (Open Network Video Interface Forum) is an industry-standard for IP-based video surveillance products that promotes interoperability between different vendors’ devices. There are several ONVIF profiles and do note that not all ONVIF-compliant devices support all ONVIF profiles and we can’t guarantee that third-party will work with our systems.
It’s essential to check the product specification sheets to ensure that your devices support the required profiles. Montavue uses the following ONVIF profiles in parallel:
– Profile S: IP-based video systems, Video & audio streaming, Pan-tilt-zoom control & relay output and Video configuration & multicast.
– Profile G: Edge storage and retrieval, Configuration, request and control recording from compliant devices, and receive audio and metadata stream.
– Profile C: IP-based access control, Site info & configuration, Event & alarm management, and Door access control.
It’s worth noting that while Montavue devices support ONVIF, we also have our own proprietary protocols and interfaces which may provide additional features and functionalities not available through ONVIF. Therefore, it’s essential to check the product specification sheets and user manuals to ensure that the devices you are using support the required functionalities and protocols for your specific application.


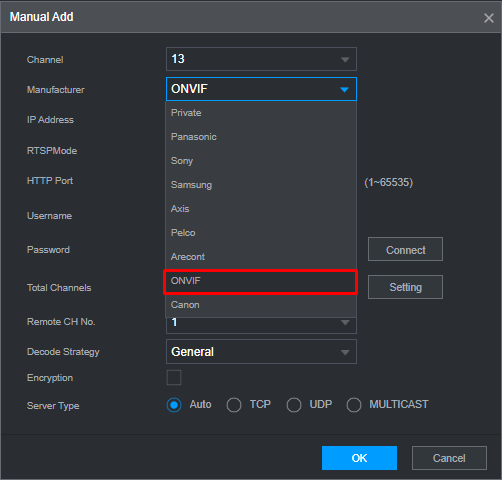
- RTSP Mode: Custom
- RTSP Port: 554
- HTTP Port: 80
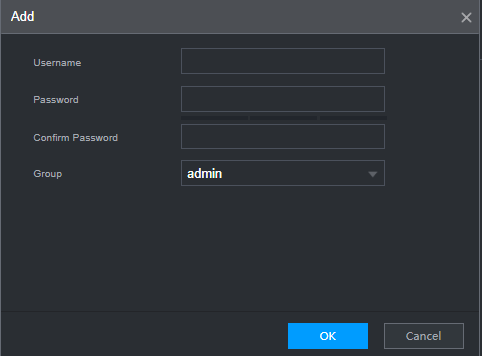
- username: admin, or whatever you set for the camera
- password: either the password of the NVR or the password of the third-party cameraYou then should be able to hit OK at the bottom and if the camera was added with the correct information you should see it on the live feed.

