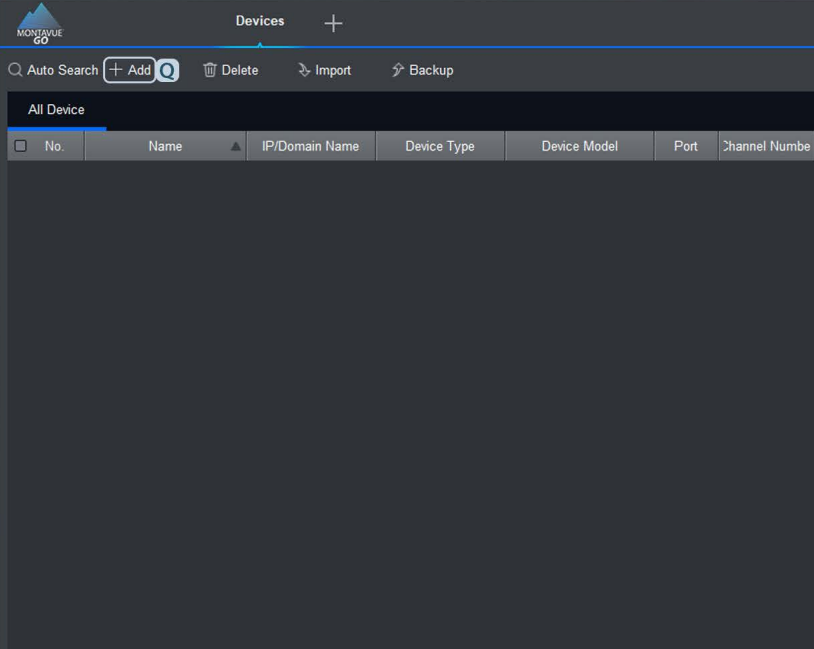
Select + Add (Q)
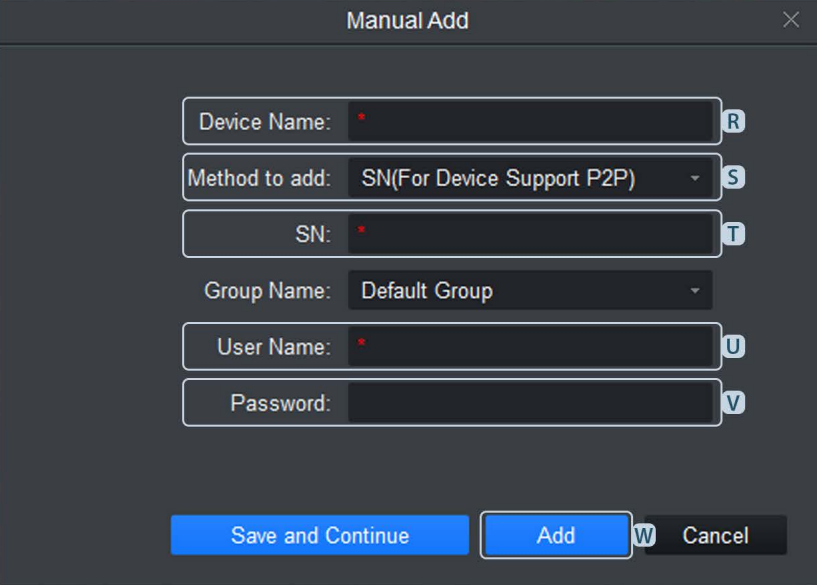
Enter your NVR name in Device Name (R)
Change Method to add dropdown (S) to ‘SN (For Device Support P2P)’ Enter your NVR serial number in the ‘SN’ field (T) (be sure to use all capital letters)
Enter your User Name (U) (usually ‘admin’)
Enter your Password for your NVR (V)
Click ‘Add’ (W) to complete adding your device
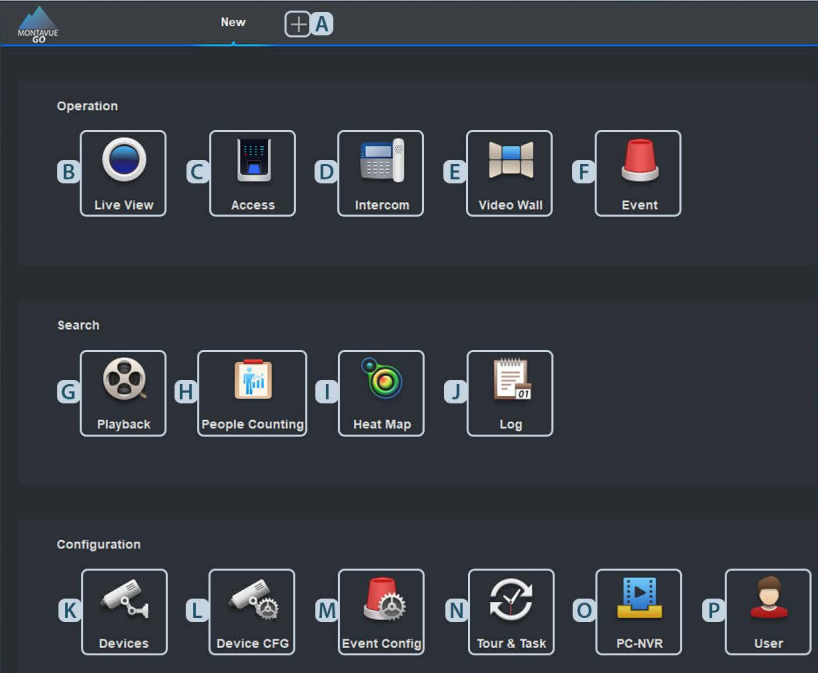
Main Menu
The main menu for MontavueGo Desktop can be accessed by clicking the ‘+’ icon (A) at the top of the app. The most commonly used Main Menu items are highlighted in the list below.
Operations
Live View (B): View your live video feed
Access (C): Access Control (unsupported)
Intercom (D): Intercom / Remote Unlock (unsupported)
Video Wall (E): Real-time video wall (rarely used)
Event (F): Real-time alarm/event information
Search
Playback (G): Review previously recorded footage
People Counting (H): Human traffic info (rarely used)
Heat Map (I): Object density info (rarely used)
Log (J): Client and Device log information
Configuration
Devices (K): Add, delete, or modify devices
Device CFG (L): Configure devices and channels
Event Config (M): Alarm setup and configuration
Tour & Task (N): Set tour task (rarely used)
PC-NVR (O): Use your PC as an NVR (not recommended)
User (P): User management
Still have questions? Contact us.