Cabling
Before you mount a camera, test it to make sure it works as expected. It’s best to label your cables so that you can connect them in the order you’d like them displayed. Avoid changing the port a camera is plugged into. If you change the camera port, select ok when prompted to update the port. Camera power & data is transferred over a single Cat5/6 cable (preferred), if you do not utilize power from the NVR or POE Switch there is an optional 12V DC socket (adapter not included). New cameras plugged directly into the NVR will automatically initialize using the NVR username and password. The NVR will automatically assign the camera an IP address of 10.1.1.X (A). This completes adding cameras for most people.
Connecting Your POE Switch (less common, only applies if you have an external POE Switch)
To wire a POE Switch, you will run an ethernet cable from one of the ports on your router (the same router your NVR is connected to) to a LAN (10/100/1000) port on your switch. Then, plug the cameras into the PoE ports on your switch.
Alternatively, if your POE switch has two LAN (10/100/1000) ports you can connect one to your router and one to the NVR’s LAN port. This will keep the traffic from the cameras on the POE switch off of your local network, and the NVR will get its network access through the POE switch.
POE Switch Device Search / Initializing Cameras
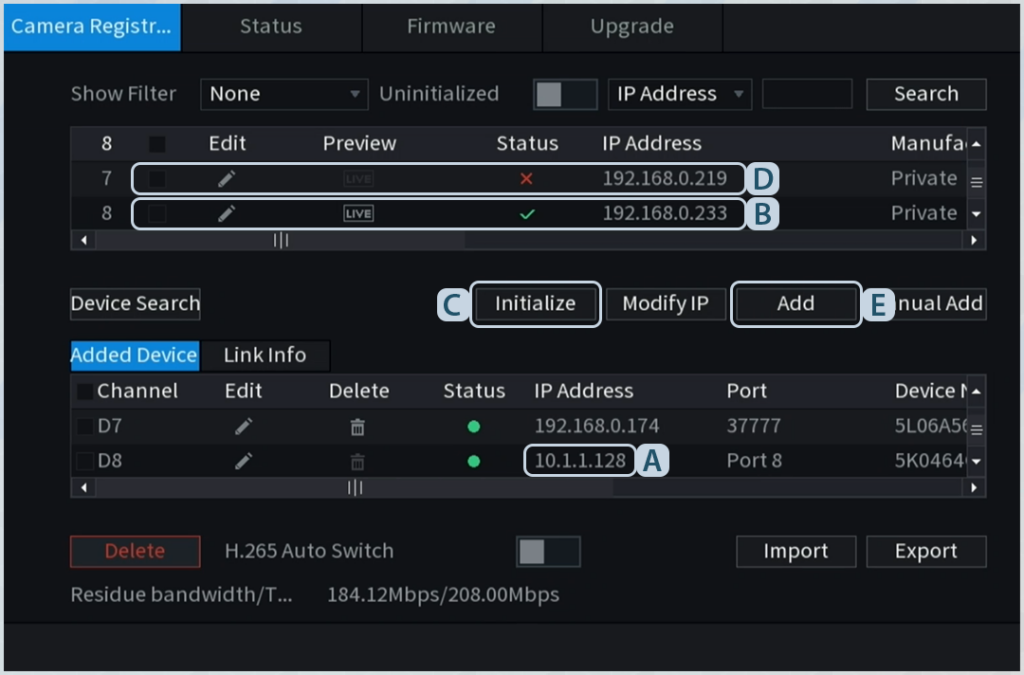
Once the switch is wired, navigate to Main Menu > Management > Camera and select ‘Registration’. Select ‘Device Search, then check the box next to any uninitialized/new cameras (B) you’d like to add and select ‘Initialize’ (C). Select ‘Using current device password and email info’ to allow the cameras to get the credentials from the NVR. On the next screen, select ’Static’ for the IP address so that the camera does not obtain a new IP address if it loses power or reboots.
Adding Initialized Cameras to a POE Switch
Initialized cameras will have a green check mark (D) instead of a red ‘X’ next to them. Check the box next to these cameras again and select ‘Add’ (E). These cameras should populate the lower portion of the page and start displaying in your live view.
Still have questions? Contact us.